"Exploring the Use of Ceramic Elevations in Architectural Modelmaking"
- Amber Weir

- Feb 23, 2024
- 3 min read
For millennia clay has been utilized as a method of construction and is one of the oldest building materials known to humankind, so when the glazed façade of our Tooting Bec Lido project was up to be modelled, I thought there’d be no better method to represent it and combine my work as ceramicist and Design and Comms lead at WR-AP.

From the ancient civilisations of Mesopotamia to our contemporary architecture ceramics have had a wide array of uses from structural to aesthetic. We still use terracotta roof tiles developed in ancient Greece and Rome as well as bricks being a construction staple since as far back as 7000 BC. For Tooting Bec ceramics is being utilised in the form of glazed bricks to create an exterior envelope that is both aesthetically pleasing, vandal resistant and comfortable for swimmers to lean against when taking a well-deserved break. The deep green of the glazed brick facing the common is intended to reflect the lush greenery of the surrounding woodland whilst the pool facing elevations are a blue tone mirroring the blue of the pool and existing changing facilities.

I have utilised clay in our modelling before with a session where I taught our casting pro (and very talented friend) Jo to transfer her skills to pottery. For this we made a small collection of elevations of Ham Close Community Centre, as well as some Christmas presents for her family.

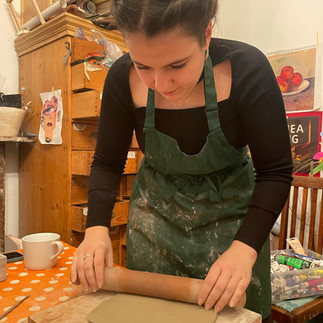


Process:
For this pair of elevations I started out with printed copies of the sections we wished to model, tracing their outlines onto a rolled out piece of clay. This is the same method I use when making my vases and makes transferring a design to clay simple. I used the Scarva St Patrick Clays SP80 Glenarm White for this particular piece which is a smooth bodied, general purpose clay.


I then peeled off the paper layer and cut into the clay to illustrate the recessed, windowed portion of the design as well as differentiating between the glazed tile and blockwork used in the second elevation.


The next step was emphasising the lines I’d made and creating greater definition between each individual tile. This took a lot of time and patience using a variety of tools to deepen the lines and clear out the scraps of clay displaced by this process.


For the elevation representing both tile and render I needed to add some texture to the clay to make it more recognisable as the material we intended to use. To make a base for the texture I first cleaned up the piece, which I also did for the fully tiled elevation, using a paint brush and some water to smooth and even out the lines. For this I used a paint brush to create some stippling as well as rubbing the canvas of the base cloth into the clay to pick up some of the fabric's texture.


Once the pieces were cleaned up, they were left to dry completely before being bisque fired. Unfortunately, as can so often be the case with slab building, the larger section warped slightly. This happens as the corners of the piece will dry at a faster pace than the centre, as well as areas of differing thickness, so to avoid it you can try and control the rate of drying and ensure there is even moisture across the piece. If the piece lends itself to it you can also sandwich it between two boards keeping it flat, but be wary of it being too heavy and restricting the shrinkage of the clay.


After the bisque comes the glazing where we add colour to the piece. I used Scarva Nano Colours NG031 British Racing Green to represent the green of the glazed tiles we’re proposing for the façade of the buildings. I brushed on three layers to try and ensure a rich and consistent colouring on the elevation models. I always suggest using a fan brush when glazing larger surface areas as you’ll get a more consistent finish. It's also important to keep an eye on the consistency of the glaze as you want it to be the texture of double cream. The water within the glaze can evaporate while it's stored causing it to become thicker, this can make it harder to achieve an even finish.
Then it’s one more firing and you’ve got yourself some ceramic elevations!


You can watch a cheeky little reel of the process over on my Instagram!
Comments